Repairing drywall holes can transform a room, restoring its beauty and integrity. Whether it’s a small nail hole or a larger gouge, the right tools and materials can make the process seamless and satisfying. Here’s your essential checklist to tackle any drywall repair project with confidence.
Gather Your Tools
First and foremost, gather your tools. A quality putty knife is essential for spreading joint compound smoothly over the patch. Choose one that feels comfortable in your hand, ideally with a stainless steel blade for durability. Next, a sanding block or sponge will help you achieve that flawless finish after the compound dries. Don’t forget a utility knife; it’s perfect for trimming any rough edges around the hole before you apply the patch.
Materials Needed
Now, let’s talk about materials. Joint compound is the backbone of your repair. Opt for a lightweight version for easier application and quicker drying times. If the hole is larger, consider using a patching compound for added strength. For holes that exceed a few inches, you’ll need a patch—either a mesh or a paper variety:
- Mesh patches: Ideal for quick fixes.
- Paper patches: Provide a smoother finish for larger repairs.
Safety First
For safety, ensure you have a dust mask and safety goggles. Drywall dust can be irritating, and protection is always a smart move. If you’re dealing with a particularly large hole, a piece of scrap drywall may be necessary to create a solid base for your patch.
The Repair Process
Once you’ve gathered your tools and materials, the repair process becomes a breeze. Start by cleaning the area around the hole, then apply your patch according to the manufacturer’s instructions. Smooth on the joint compound, feathering the edges to blend seamlessly with the surrounding wall. After it dries, sand it down, and you’ll be left with a surface that’s ready for a fresh coat of paint.
Conclusion
Investing in quality tools and materials not only enhances your repair experience but also ensures long-lasting results. Say goodbye to unsightly holes and hello to a polished finish that elevates your space. With this checklist in hand, you’re well-equipped to take on drywall repairs like a pro, transforming any imperfection into a testament to your DIY prowess.
Related products
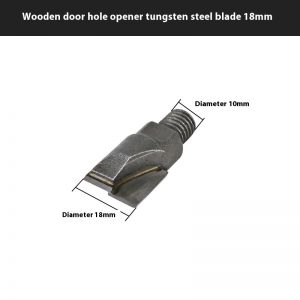
Solid Wood Door Tapper – Essential Woodworking Tool for Indoor Lock Installation and Unlocking Holes
EasyRippertm Drywall Cutter – Effortless Cutting Tool for Perfect Results
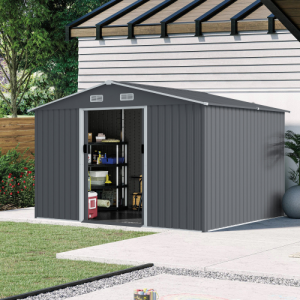
Heavy Duty Outdoor Storage Shed 8 X 10 FT – Large Metal Tool Shed with Sliding Doors and Air Vent for Patio & Lawn Storage of Bikes, Tools, and Lawnmowers – Grey